Showing posts with label dessert. Show all posts

Saturday, November 19, 2011

The BEST Gluten Free Brownies You Will Ever Eat!


Cadee’s Ultimate GF Brownie Recipe:
1 ½ sticks of real butter (not margarine or Crisco)
2 cups of quality bittersweet/semisweet chocolate chips (I use Ghirardelli brand)
¾ cup Gluten Free Flour Mix (click here for my ALL PURPOSE GF Mix)
5 large eggs
2 cups brown sugar
½ tsp. salt
1 tsp. vanilla extract
Preheat Oven to 350 degrees F.  It’s best to use a mini-muffin pan (non-stick) and liberally grease with spray.  Otherwise, butter/grease a 9x9 or 9x13 baking dish/brownie pan. OR use parchment paper which makes getting brownies out later much easier!  

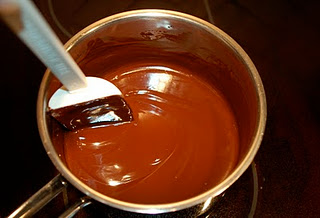
In a small saucepan, melt butter over low heat, do not let butter get too hot. Add chocolate to melted butter Melt chocolate SLOWLY on low still (it will seize and ruin if you do not heat it on low and slow!) in HEAVY bottom saucepan.  (If you don’t have a heavy bottomed saucepan, you will need to melt butter first, then separately prepare a double boiler to melt the chocolate, then combine the melted butter and chocolate)  Set aside butter/chocolate mixture to cool down, stirring once in awhile.

In a medium mixing bowl, combine the eggs, brown sugar, salt and vanilla extract. Using a mixer, fitted with a WHISK attachment, beat on HIGH speed until the mixture thickens and becomes pale in color. At this stage the mixture should fall from the beater in a wide ribbon that folds back on itself and slowly dissolves into itself. This entire process takes approx. 5 minutes.
Using a rubber spatula, fold the cooled chocolate into the egg mixture. Add the flour and FOLD it in quickly but gently taking care not to deflate the air that’s been incorporated into the eggs.


For mini-muffins: Fill each one almost to the top with brownie batter.  For brownie squares: Pour the batter into the prepared (8x8 or 9x9 preferably) glass baking dish and smooth the top with the spatula.**** I find it easier to leave the brownie batter in the refrigerator prior to baking. The batter will harden into a cookie dough consistency. It will still bake fine, just add 2-3 minutes onto baking time. If making mini-muffins, a stainless steel mini ice cream/cookie dough scoop works best to scoop and fill muffin pan. Otherwise, make sure each ball of dough is at about the capacity of the muffin cup size when filling the mini muffin pan.

Bake until the top looks slightly cracked and feels soft to the touch. For a larger pan (thinner brownies) bake approx. 25 min.;  for a smaller pan (thicker brownies) bake approx. 40 min. For mini-muffin brownie bites bake approx. 16-17 min.

Thursday, November 17, 2011

Organic Pumpkin Cheesecake (with Gluten-Free/Yeast-Free Graham Cracker Crust)

I promise nobody will know this crust is Gluten Free, NOBODY. I pride myself in "tricking" people who think they can taste GF food a mile away. I use this brand of GF/YF graham crackers for the crust: Kinnikinnick (I think I spelled it right!).

Ingredients

Crust:

  • 1 3/4 cups gluten-free/yeast-free graham cracker crumbs
  • 3 tablespoons raw coconut crystals, any natural sweetener that's 1:1 sugar OR light brown sugar
  • 1/2 teaspoon ground cinnamon
  • 1 stick melted, salted butter

Filling:

  • 3 (8-ounce) packages cream cheese, at room temperature
  • 1 (15-ounce) can pureed pumpkin OR 2 cups home made pumpkin puree
  • 3 eggs plus 1 egg yolk
  • 1/4 cup sour cream 
  • 1 1/2 cups raw coconut crystals OR sugar
  • 1/2 teaspoon ground cinnamon
  • 1/8 teaspoon fresh ground nutmeg
  • 1/8 teaspoon ground cloves
  • 2 tablespoon all-purpose GF flour OR Potato Starch
  • 1 teaspoon vanilla extract

Directions

Preheat oven to 350 degrees F.
For crust:
In medium bowl, combine crumbs, sugar and cinnamon. Add melted butter. Press down flat into a 9-inch springform pan. Set aside.
For filling:
Beat cream cheese until smooth. Add pumpkin puree, eggs, egg yolk, sour cream, sugar and the spices. Add flour and vanilla. Beat together until well combined. Pour into crust. Spread out evenly and place in oven for 1 hour. Remove from the oven and let sit for 15 minutes. Cover with plastic wrap and refrigerate for 4 hours.

Wednesday, November 9, 2011

Thanksgiving Organic Sugar Pie Pumpkin Pie

Organic Sugar Pie Pumpkins!

Start with an organic Sugar Pie Pumpkin. I got mine from the local grocer, but it originally came from Tutti Frutti's Farm (click here).


Roasting Your Pumpkin:
A medium sized pumpkin will be enough for one pie and use any extra for custard (the pie filling without the crust) ***Here, I roasted 2 pumpkins because I wanted to freeze any extra puree I had for using later on.***  Roasting a pumpkin is very simple. Take off the stem. Cut the pumpkin in half.


I have always wanted better knives!Scoop out the pumpkin seeds and reserve. You can roast them later for a delicious snack.
Using a sturdy spoon with a sharp edge, scoop out the stringy stuff and save the seedsTurn the pumpkin halves cut sides down on a cookie sheet and roast at 400 for 30-40 minutes, or until you can stick a fork in the outside of the skin and have it pierce easily.
They look like I oiled them, but it's just them getting sweaty in the hot oven!
Roast the seeds for an amazing and healthy snack! Try one of these recipes: roasted pumpkin seeds
Let the pumpkin cool and scoop out the insides. Process the pumpkin innards in a food processor until smooth or use an immersion blender (my personal choice).


You can freeze the pumpkin puree or refrigerate it for up to 7 days.
ON TO BAKING THE PIE: