Showing posts with label recipes. Show all posts

Wednesday, February 22, 2012

Grilled Artichokes with Easy Aioli

organic artichokes....such a treat
Did I mention before how much I love the Cheesecake Factory? It is my all time favorite "junk" food source. But, not everything they have on the menu is all that bad in terms of health. CF has a way of making good stuff taste like it's bad for us! Love it!  I had their grilled artichokes a few months ago and have been craving them ever since. Well, thanks to some researching and deducting, I think I have found what makes them taste so amazingly decadent. We rarely find organic artichokes, so when we do, we buy them up. Pricey? Yes! Worth it? Yes!
The artichoke's meat is at the base of it's leaves, but don't forget the heart! It's the best part!
You will need your BBQ for this one. But if you are living where it's too cold to BBQ, you could try roasting them in your oven instead. I haven't tried roasting them, so if you do, please tell me how it goes! Just make sure to follow the same directions up until the BBQ part if you decide to roast yours.

Need:

2-4 artichokes (how much do you LOVE them?)
1 1/2 lemons, juiced
1/4 cup olive oil
2 cloves fresh, minced garlic
1 tsp. sea salt
freshly cracked black pepper

Put a large pot of water on high heat to boil, meanwhile: fill a LARGE bowl with cold water and juice from ONE of the lemons (save lemon rind). Halve the artichokes (carefully!) and submerge into the bowl of lemon water. When water on stove is boiling, carefully place artichokes into pot (with long tongs) and add the lemon rinds. Boil for 20 minutes uncovered.
Boil, uncovered for about 20 minutes, taking care not to boil too much or the leaves will start to fall off
Heat Grill on high (or oven at 450 degrees F).

Empty the lemon water from the bowl to use for tossing drained artichokes with the last HALF of lemon juice, olive oil, garlic, salt and pepper.  
Toss boiled artichokes with olive oil, garlic, lemon juice, salt and pepper, then grill
Turn grill down to medium heat. (If using oven, roast in middle of oven, keeping an eye on them, turning once and basting every few minutes until charred)  Grill artichokes,  turning once and basting every 5 minutes until artichokes start to char. Remove from heat and serve with amazing aioli dipping sauce (recipe below).
The charring you see adds a layer of amazing flavor!
Easy Aioli:

1/2 cup mayonnaise
4 cloves fresh, minced garlic
juice from one lemon
1 tsp. sea salt
cracked black pepper

Mix together and enjoy with artichokes
Tastes great with any meal or all alone!

Apricot Glazed Pork Kebabs


Although these are best on the BBQ (sorry to those Northerners  whom we love dearly and do not have the BBQ out all year long), the meat chunks could be pan fried (wok style if you have one) and finished in the oven. Here is an easy recipe that can be made in just 15 min. (allow 30 min. for marinating first).

Need: *see note about skewer sticks below


1 jar (8-10 oz.) of organic apricot preserves or jam
2 Tbsp Tamari (wheat-free soy sauce) or soy sauce for those who can eat wheat
1 Tbsp lemon juice
2 garlic cloves, minced
2 lbs. pork tenderloins, trimmed well and cut into 2-inch pieces
1 tsp. salt
1 tsp. freshly ground pepper


*While preparing above ingredients, soak bamboo skewer sticks (for kebabs) in water. This avoids the stick burning on the BBQ. I find that the sticks fit best in an oblong baking dish.
Simple, whole ingredients yielding a slightly sweet and tasty end result

I prefer to marinate everything in glass, it is best for flavor and for health (as opposed to plastic baggies or containers)
Thread meat onto skewers carefully
Heat preserves on stove in small sauce pan until warmed through. Stir in Tamari (or soy sauce), lemon juice, garlic, salt and pepper. Set aside about 1/3 cup of sauce. Dump remainder of sauce into small glass container or bowl with pork to marinate at room temp. for about 30 min. Thread pork evenly onto skewers. Grill for about 4 minutes on each side while basting with the set aside apricot marinade, until desired cook temp. is achieved for your pork. If you cannot grill, heat large, heavy pan on stove to medium. Add your favorite healthy oil, brown pork (not on skewers) and baste again before finishing in an oven at 375 degrees F. for about 5 min, or until meat is cooked to your liking.
A delicious, light centerpiece to your meal

Roasted Fingerling Potatoes with dipping sauces


A quick, easy, delicious treat for everyone
I like to think of this dish as fancy french fries (and healthier). As for the dipping sauces, well, at least I know mine don't contain garbage ingredients! This can be enjoyed as an appetizer, side dish, or anytime snack. Pretty versatile and super duper easy.

Need:

1 1/2 lbs. organic fingerling potatoes, sliced in half lengthwise
3 Tbsp of your favorite healthy oil
1 tsp. paprika
2 tsp sea salt
1 Tbsp freshly ground pepper

Toss well to coat each potato

Preheat oven to 375 degrees F. Toss ingredients together in a large bowl then lay on a cookie sheet (preferably lined with parchment paper). Roast in oven for about 45 min. or until golden brown. Serve with your favorite dipping sauces. Below are a few suggestions:
Roast for 45 min. or until golden brown

Garlic Aioli:

1/4 cup real mayonnaise
2 cloves freshly minced garlic
1/2 lemon, juiced
salt and pepper to taste

Spicy Mayo:

1/4 cup real mayonnaise
1-2 Tbsp of Sriracha (or your favorite hot sauce)

BBQ Ketchup:

1/4 cup ketchup
2 Tbsp chili mix/blend powder seasonings
1 tsp garlic powder
1 tsp brown sugar
Experiment with different dipping sauces!


Have fun with this delicious treat!

Wednesday, January 25, 2012

Gluten Free All-Purpose Flour Mix Recipe

Make your own all purpose, gluten free (AP GF) flour mix! Store in a glass, airtight container for best results.
Gluten free cupcakes, Yummo!

Where are my manners? All this writing and recipes about GLUTEN FREE, yet not any recipes on how to make one's own gluten free all-purpose flour mix to use when recipes call for it! Here are a few options that I have used and enjoyed. Use these mixes as you would use your white/wheat based flour recipes. Use 1 for 1. If you've never tried gluten free baking or cooking, don't be afraid. Yes, it is a slightly different texture with some recipes. Yes, it will bake longer or shorter some times. Yes, your cookie may even be shaped differently. I won't lie, some recipes should not be made gluten free. I have tried the gluten free breads, and they can be a challenge, but I have made some darn good GF cinnamon buns! GF cut-out cookies were tedious, fyi. If anyone has mastered this I would love to know your secret. Don't use only one type of flour for GF baking because it WILL disappoint you. There is a science behind the mixing of the flours, trust me on this. Stick with one of these combos and you'll be fine!

I always make huge batches at one time (and freeze some if I have too much). So double, triple, whatever you want when making your GF flour mix.

Gluten Free All-Purpose Flour Mix # 1:

1 cup of sorghum flour or brown rice flour
1/2 cup of millet or buckwheat flour (also can use almond meal, it's just more expensive, although super healthy!)
1 cup tapioca, potato starch (not potato flour) or corn starch (not corn flour)
1 tsp. xanthan gum

*Best mix for using with breads, muffins, cookies, and cakes

 Gluten Free All-Purpose Flour Mix # 2:

1 cup of sorghum flour or brown rice flour
1/2 cup of millet flour
1/2 cup of buckwheat flour
1/4 cup quinoa or almond flour
3/4 cup potato starch, (not potato flour) tapioca starch or corn starch (not corn flour)
1 tsp xanthan gum

*This is best used for dense breakfast muffins, cookie bars and bread

You will need to mix your flours very well, I use a fork or a whisk to do this. Also, be precise in your measuring. Store in a glass, air tight container, away from heat or moisture sources.
Use the back of a knife, or any flat utensil (this is a frosting spatula) to properly measure by taking the mound off the top of your measurement of each flour

The Gluten Free Goddess has a TON of recipes and information for those ready for in depth baking and learning.

For newbies, I suggest starting with a pre-mixed store bought all-purpose gluten free mix, like PAMELA's Ultimate Baking and Pancake Mix. If you find you're gaining confidence, then try the mixes above, as it is more economical to make your own mix. Pamela's also makes an AMAZING chocolate cake GF mix. Truly, nobody will know the difference!
I found it on sale at Wal Mart!!!


these turned into...........
.......these! Who knew the martians could taste so good without gluten?


Suggestions and "Good to Know":

1. Buy your GF flours in bulk when possible (or larger bags)
2. Buy organic GF flours when possible
3. Make your own almond meal (if you have a Blendtec, Vitamix, grain mill, or something powerful like these to make fine almond meal flour with almonds- buy almonds in bulk, organic if possible)
4. The starches have almost no fiber or nutrition (they are strictly there to help incorporate and bond the flour when used in recipes)
5. Most GF flours have way more fiber than white flour.  White rice flour is low on the scale of fiber at 1 gram and brown rice flour comes in at 2 grams per 1/4 cup serving size. Quinoa has 2 grams, sorghum has 3 grams, millet has 3 grams, buckwheat has 6 grams, all at 1/4 cup serving size. Coconut Flour (not mentioned in above mix recipes, see why I don't use it in the GF AP mix in explanation below) has 6 grams of fiber for ONLY 2 Tbsp serving size!!
6. Recommended brands of gluten free flours: Bob's Red Mill (organic when possible) and Arrowhead Mills, I can find these almost anywhere, so I am confident you can as well. If not, look at Vitacost.com.
7. Don't freak out when you see how much xanthan gum costs. You will only use it in very small doses and it is a must!
This brand will probably look familiar to you!

I absolutely adore coconut anything, however, when baking with coconut flour, it is important to remember that it is HIGH in fiber, therefore VERY drying. It absorbs moisture like a sponge.  It can suck the life out of your cookies or muffins leaving them crumbly and not so yummy. So, I use it sparingly in recipes, never as a 1 for 1 substitute for white or wheat flours. I will throw in a tablespoon here or there if I want to make a GF batter recipe more stable and thick. Remember, 1 tablespoon is equal to 3 grams of fiber. That is excellent stuff!

Happy baking and cooking to all you gluten free buddies!

Sunday, January 22, 2012

Chicken Bellagio

The amazing part is that this can all be made gluten free!

I grew up in a very small town. The only restaurants were Mom and Pop types, with the exception of one McDonald's. What town doesn't have one of these (unfortunately)? My Mom raised me by herself (after rearing 4 older boys, Amen.) and had barely enough energy after a long day's work, to go grocery shopping, let alone come home to cook a meal and clean up after it. So, we ate out. A lot.

Fast forward 15 years, during my first few years of marriage, we had moved to several different places. I remember looking in the phone book of Pensacola, Florida and gasping at the 15+ McDonald's listed in the Yellow Pages. Where I am going with this is that my initial love for chain restaurants came with my new exposure to them. Applebee's, Chili's, Outback, Olive Garden, etc.....all of these were so wonderful to my virgin, chain restaurant going self. Now, I won't go to these places without a blindfold and pretty much a gun to my head. I will sacrifice for a trip to Olive Garden very rarely only because my eldest daughter loves it so much and we tend to treat her on her birthday. I wasn't a fan of Chik Fil A and Five Guys (again, limited exposure to these) until a few years ago, but that is waning also. Enter, CHEESCAKE FACTORY (Angels singing "Hallelujah"). I know, I know....it's still a chain and it's still "junk" food. However, if I am going to have to eat while out and about, and there happens to be one in the vicinity, I am there. The spiral bound book of a menu, the variety of meals from Asian, to Mexican, to home-style cooking, never mind the bazillion types of amazing cheesecake.....and it all tastes GOOD! So here it is, my rendition of "Chicken Bellagio", a favorite of mine (one of too many) from the Cheesecake Factory. Here's to you Lyssa, my Chicken Bellagio buddy.....and to you, my brother, Scot, for the wonderful trips we've made there and the many gift cards you have furnished us for there!

(This recipe is made without wheat based flour, but you can sub any flour, including white/wheat if you so desire)

CHICKEN BELLAGIO (Cheesecake Factory inspired)

This is for 6 servings- so halve the recipe if you desire. Leftovers are yummy too!

3 boneless chicken breasts, sliced into 6 filets by cutting breasts into thin halves
(like cutting a deck of cards in half)- some pound the chicken, but I prefer to skip this step
6 slices Prosciutto


Breading:
1 1/2 cups all purpose gluten-free flour mix (or your choice of flour)
1/4 cup Parmesan cheese
1 Tbsp. sea salt
2 tsp. cracked pepper
1 Tbsp. oregano
3 large eggs, beaten
splash of milk

Sauce:
1 pint heavy whipping cream
6 Tbsp. prepared pesto sauce (your choice, I used Buitoni's, makes it easier and tastes great)
2/3 cup Pecorino or Reggiano Parmesan (Pecorino is from sheep's milk, Reggiano is from cow's milk)
2 tsp. salt
1 Tbsp pepper

Pasta and the rest:

Angel hair pasta- enough for 6 servings (use this brand for wheat free pasta: Ancient Harvest Quinoa )
3 Tbsp. prepared pesto for prepared pasta
1 stick of butter, for frying, and extra for the prepared pasta
3-4 Tbsp. olive oil for prepared pasta
3 cups Arugula, washed
1/2 cup grated, fresh Parmesan for topping

*In a container, mix flour, Parmesan cheese, salt, pepper and oregano. In another container, whisk eggs and splash of milk. Set two together as a station.
Here is my egg wash and flour dredging station
 Heat heavy pan on medium heat, add 2 Tbsp. butter. Coat chicken breast in flour mix, then egg mixture, then dredge in flour mixture again. Place in hot butter and fry each side until golden (adding more butter as needed). You will need to fry in batches, cleaning pan with paper towel (see my photo) in between. Then place in a baking dish. Finish in oven at 375 degrees F for 10 min. to ensure the middle is cooked thoroughly (but not too dry!) Check one piece to see if it is cooked before taking out of oven.

I used gluten free flour for this and look how yummy, golden brown it is!

I use my tongs and a paper towel to wipe up in between batches. This helps avoid any burnt bits on the subsequent batches.

Pasta and Prosciutto: While chicken finishes in the oven, boil your pasta according to directions. Lightly fry the Prosciutto slices in pan with small amounts of butter. Save aside. Make cream sauce next.

Sauce: Heat heavy cream until hot in sauce pan, add the pesto sauce and whisk. Add salt and pepper. As sauce begins to thicken, add the Parmesan cheese while whisking constantly to incorporate. Continue until mixture thickens then reduce to very low/warm until ready to serve.

Assembly: After draining pasta, add the 3 Tbsp. prepared pesto, add 3 Tbsp. butter and 3 Tbsp. (or more if you'd like) of olive oil. Toss well. Place 1/2 cup of Arugula on plate, top with a serving of prepared pasta, 1/3 cup of cream sauce, one of the chicken filets, the lightly fried Prosciutto, and freshly grated Parmesan.

The peppery flavor of the arugula truly compliments the Parmesan sauce and all the flavors of this dish, don't skip it!


I cannot tell you how impressed I was with myself. This could almost pass in a blind taste test for the real thing. Try it yourself and tell me if you agree! Excuse me, I have some leftovers calling.

Saturday, January 21, 2012

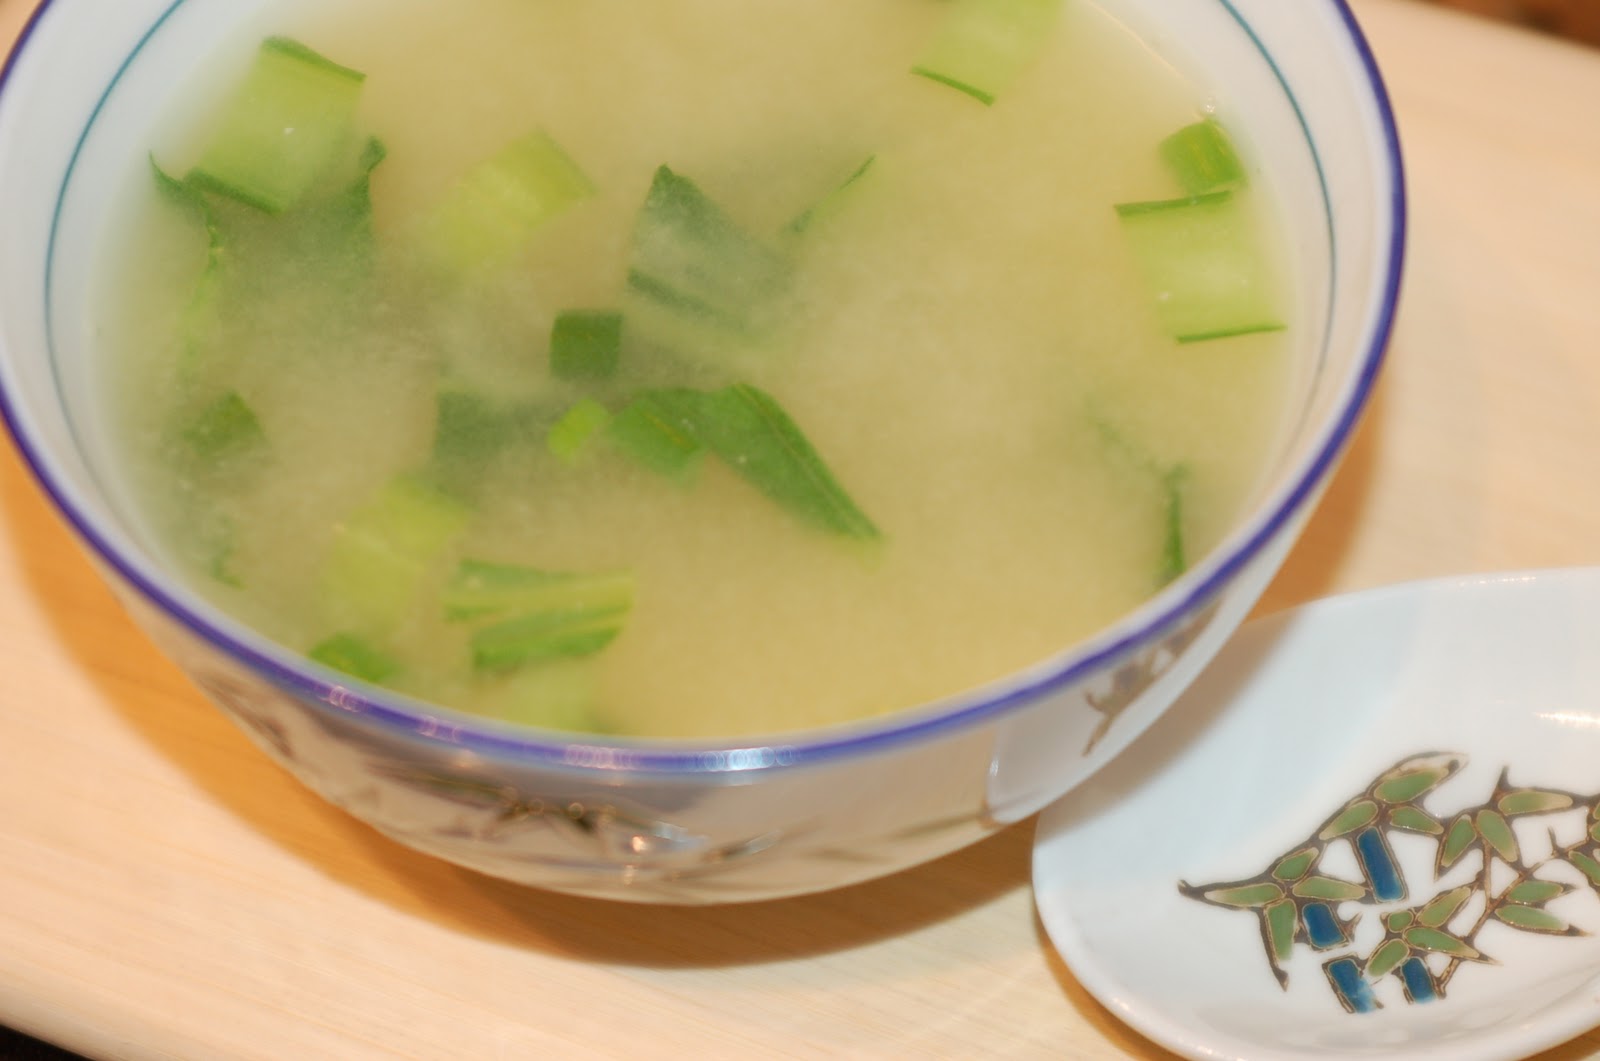
Easy Miso Soup

This is all organic, delicious, healthy, made with light Miso paste

I discovered this Miso Soup paste recently, and I must say, it tastes delicious even by itself! Whenever we go to an Asian restaurant, 2 of our daughters enjoy the Miso soup tremendously. I find satisfaction in knowing that I am able to make an organic version in my own home, any time. It is so easy that my daughters also can make it! You should be able to find this at any well stocked health food store.

Miso Master Light Miso Paste Ingredients: Organic Whole Soybeans, Organic Handmade Rice Koji, Sun-Dried Sea Salt, Blue Ridge Mountain Well Water, Koji Spores.
Aged 2 - 4 months.
Unpasturized


I dare say it is considered gluten free. It is made in a facility with barley, fyi. My daughter has an intolerance to gluten, not Celiac's disease, and this is perfectly fine for her.

The only 2 necessary ingredients (besides hot water!)


It looks like a thick hummus!

Here it is:

10 oz. of hot water, 2 Tbsp. Miso soup paste, 2 Tbsp. Better Than Bouillon paste (OR if you are lucky enough to have some bone broth or home made stock, use that instead. Just heat 10 oz. broth/stock then add the Miso soup paste.) Stir well. Enjoy!

*Note, do not put the miso paste into boiling water, only resting hot water, as the probiotic benefits will decrease.


Optional: Sliced baby bok choy and/or sliced scallions- add in at any point

Wednesday, January 18, 2012

Easy Beef Stew with Scalloped Potatoes

Grass Finished, organic stew beef makes a great comfort meal!

I guess I am a meat and potatoes kind of girl.  At least for today I am. This meal has "comfort" written ALL over it. Please try to find some Grass Finished beef, no garbage (hormones, antibiotics, etc.) and pasture raised. And, as usual, if you are able to purchase your groceries as all organic, do so! If not, do what you can, every little bit helps. Let's get on with it!

Ingredients for Beef Stew:

2 -3 lbs. of Grass Finished, organic beef stew chunks (or if it's cheaper, buy a roast and cut it yourself, ask the butcher what he recommends)
1 cup all purpose gluten free flour
1 Tbsp paprika
1 Tbsp garlic powder
1 Tbsp thyme
1 Tbsp salt
1 tsp cracked black pepper
2 medium onions, sliced
4 cloves garlic, minced
your favorite healthy oil or butter
1 cup beef broth


Saute onions in your favorite oil or butter on low-medium heat until slightly caramelized. Add a tad more oil/butter and saute minced garlic for 30 seconds. Put onions and garlic mix on the bottom of a large baking dish.

Grass Finished, organic beef


Mix flour with the spices. Heat large pot or pan on the stove with your favorite oil to a medium heat. Use slightly lower heat if using butter. Pat beef chunks dry with paper towels (don't be tempted to skip this or you'll have a soggy mess on your hands later). You will need to cook the beef in 3-4 batches, adding more oil/butter for each new batch. Sear beef chunks on all sides.  Cover onion mix with beef chunks. Pour in the beef broth, cover with foil. Bake on 350 degrees for about 2 hours or until fork tender.
Braising first batch of beef with gluten-free flour and healthy oils/butter

first braised batch done

All 3 batches ready to be roasted in the oven, cover tightly with foil to roast.

Scalloped Potatoes
I could eat this all day


Ingredients:


2 lbs. (or roughly 5 medium potatoes) of your choice potatoes (I prefer yukon gold, red, or white) sliced thin
1 Medium yellow onion, sliced
8 oz. shredded medium cheddar cheese
1 cup heavy cream
1 tsp. nutmeg
salt
pepper
5 Tbsp. butter
Mix ingredients all together

Pour out into a baking dish, top with butter pats, and put in oven with beef during the last hour, uncovered

Mix all ingredients in a large bowl and then dump into a large baking dish. Top with pats of butter. Put in with beef stew (at 350 degrees F) for the last hour, uncovered, or until potatoes are tender. *If making this dish separate to this recipe, it would be faster to cook at 375 degrees F for 45 min.
Close up goodness!
Caramelization = love

Fruity Smoothie (with lots of benefits!)


I don't go by recipes for much, especially when making a smoothie. It is usually made from whatever I happen to have on hand. Today's smoothie came out great, I must say. This one could have doubled as a dessert, so if you don't like too sweet, leave out the Agave.

Ingredients: 

1/2 cup Raspberry Amasai (or yogurt, or kefir)
1 banana
1 kiwi (ends cut off)
1/2 cup strawberries (I used frozen)
1/2 cup blueberries (I used frozen)
splash of milk
1 Tbsp. agave syrup
2 Tbsp. ground flaxseeds

Blend until desired consistency is achieved, adding a splash of milk extra if needed.

Tuesday, January 10, 2012

Quickie Chickie Soup!


I happen to have a lot of sick friends lately. Yes, a lot of my friends are sickos. It makes my life happy to know that I am not the only one.

There are SO many chicken soup recipes (traditional caldo de pollo is one of my favorites!). My Momma has always touted that chicken soup with lots of garlic and ginger is healing. She used to make for me a version called, "Penicillin soup" that she claimed had healing powers. Anytime someone in our family came down with some sort of cold or flu, my Mom would get a phone call (before the internet) begging her for her prized recipe.

This quickie recipe goes out to all you sickos who don't happen to have your own, home made organic chicken stock in your fridge or freezer. I always intend to make it, but it rarely happens. "Bone broth" does have some wonderful healing properties and is what I recommend first and fore most, but in a pinch, this is second best, in my opinion:
I found BIG jars of this at my Costco store. It is a deal if you can buy it that way!

So that  is it, up there ^ , my secret weapon for "in a pinch chicken stock" in any recipe. I love it.

For a small batch of Quickie Chickie Soup (about 4-5 servings) you will need:

Please do not notice that I grabbed the beef flavor instead of the chicken, I did catch it before adding to the water.
1-2 boneless chicken breasts, chopped into thumb nail size pieces (the healthiest chicken you are lucky enough to find)
1 small onion, minced
2-3 cloves minced garlic
6-8 carrots, peeled and chopped into 1/2 inch chunks
8 cups of water (purest water you have access to)
Prepared rice- your choice of grain (I used Thai/Jasmine rice because that's what I had in my freezer from extra after our dinner the other night)

*If you like ginger, use freshly minced if possible, and add into the stock at any point for extra bonus points!

Saute the onion in your choice of healthy oil, butter, or ghee for about 1-2 minutes, then add the garlic, saute one more minute. Add 8 cups of water, 2-3 Tbsp. of the "Better Than Bouillion" paste, according to how salty you like your broth. Bring to a low boil, add carrots, simmer for about 5 min. then add the chicken pieces. Add your rice, and once chicken is cooked through, voila! Easy peasy (Rachel Ray, I can say it if I want to).

Make some and GET WELL!