Wednesday, January 25, 2012

Gluten Free All-Purpose Flour Mix Recipe

Make your own all purpose, gluten free (AP GF) flour mix! Store in a glass, airtight container for best results.
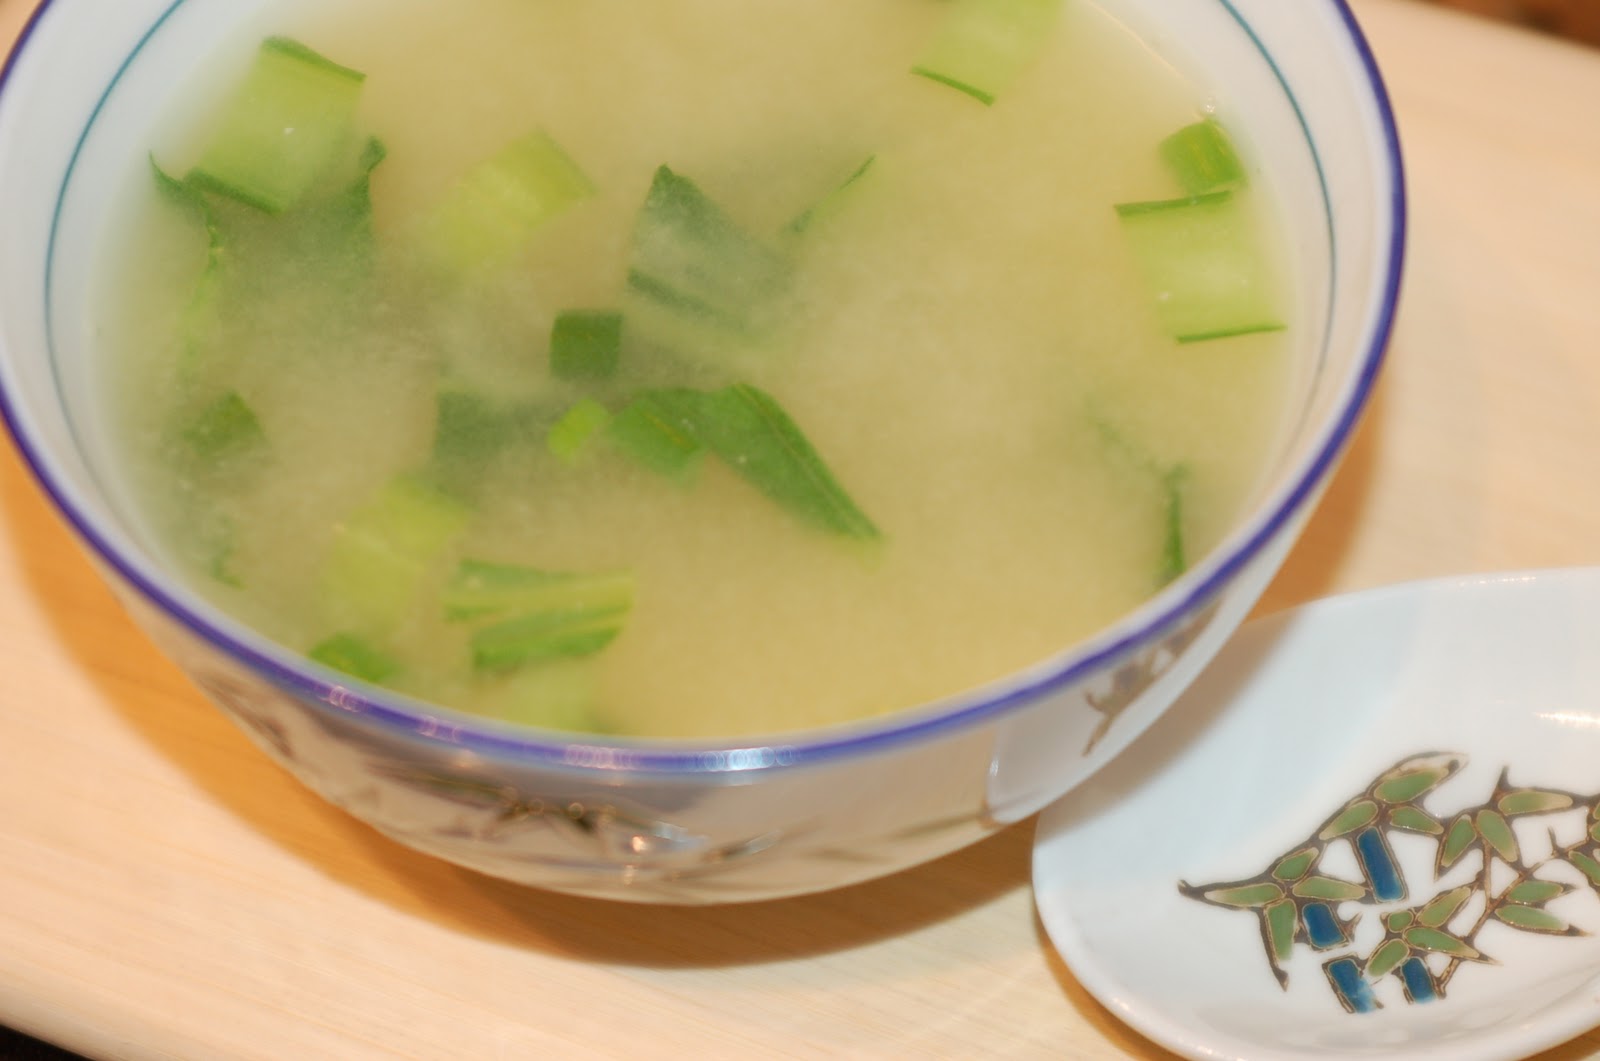
Gluten free cupcakes, Yummo!

Where are my manners? All this writing and recipes about GLUTEN FREE, yet not any recipes on how to make one's own gluten free all-purpose flour mix to use when recipes call for it! Here are a few options that I have used and enjoyed. Use these mixes as you would use your white/wheat based flour recipes. Use 1 for 1. If you've never tried gluten free baking or cooking, don't be afraid. Yes, it is a slightly different texture with some recipes. Yes, it will bake longer or shorter some times. Yes, your cookie may even be shaped differently. I won't lie, some recipes should not be made gluten free. I have tried the gluten free breads, and they can be a challenge, but I have made some darn good GF cinnamon buns! GF cut-out cookies were tedious, fyi. If anyone has mastered this I would love to know your secret. Don't use only one type of flour for GF baking because it WILL disappoint you. There is a science behind the mixing of the flours, trust me on this. Stick with one of these combos and you'll be fine!

I always make huge batches at one time (and freeze some if I have too much). So double, triple, whatever you want when making your GF flour mix.

Gluten Free All-Purpose Flour Mix # 1:

1 cup of sorghum flour or brown rice flour
1/2 cup of millet or buckwheat flour (also can use almond meal, it's just more expensive, although super healthy!)
1 cup tapioca, potato starch (not potato flour) or corn starch (not corn flour)
1 tsp. xanthan gum

*Best mix for using with breads, muffins, cookies, and cakes

 Gluten Free All-Purpose Flour Mix # 2:

1 cup of sorghum flour or brown rice flour
1/2 cup of millet flour
1/2 cup of buckwheat flour
1/4 cup quinoa or almond flour
3/4 cup potato starch, (not potato flour) tapioca starch or corn starch (not corn flour)
1 tsp xanthan gum

*This is best used for dense breakfast muffins, cookie bars and bread

You will need to mix your flours very well, I use a fork or a whisk to do this. Also, be precise in your measuring. Store in a glass, air tight container, away from heat or moisture sources.
Use the back of a knife, or any flat utensil (this is a frosting spatula) to properly measure by taking the mound off the top of your measurement of each flour

The Gluten Free Goddess has a TON of recipes and information for those ready for in depth baking and learning.

For newbies, I suggest starting with a pre-mixed store bought all-purpose gluten free mix, like PAMELA's Ultimate Baking and Pancake Mix. If you find you're gaining confidence, then try the mixes above, as it is more economical to make your own mix. Pamela's also makes an AMAZING chocolate cake GF mix. Truly, nobody will know the difference!
I found it on sale at Wal Mart!!!


these turned into...........
.......these! Who knew the martians could taste so good without gluten?


Suggestions and "Good to Know":

1. Buy your GF flours in bulk when possible (or larger bags)
2. Buy organic GF flours when possible
3. Make your own almond meal (if you have a Blendtec, Vitamix, grain mill, or something powerful like these to make fine almond meal flour with almonds- buy almonds in bulk, organic if possible)
4. The starches have almost no fiber or nutrition (they are strictly there to help incorporate and bond the flour when used in recipes)
5. Most GF flours have way more fiber than white flour.  White rice flour is low on the scale of fiber at 1 gram and brown rice flour comes in at 2 grams per 1/4 cup serving size. Quinoa has 2 grams, sorghum has 3 grams, millet has 3 grams, buckwheat has 6 grams, all at 1/4 cup serving size. Coconut Flour (not mentioned in above mix recipes, see why I don't use it in the GF AP mix in explanation below) has 6 grams of fiber for ONLY 2 Tbsp serving size!!
6. Recommended brands of gluten free flours: Bob's Red Mill (organic when possible) and Arrowhead Mills, I can find these almost anywhere, so I am confident you can as well. If not, look at Vitacost.com.
7. Don't freak out when you see how much xanthan gum costs. You will only use it in very small doses and it is a must!
This brand will probably look familiar to you!

I absolutely adore coconut anything, however, when baking with coconut flour, it is important to remember that it is HIGH in fiber, therefore VERY drying. It absorbs moisture like a sponge.  It can suck the life out of your cookies or muffins leaving them crumbly and not so yummy. So, I use it sparingly in recipes, never as a 1 for 1 substitute for white or wheat flours. I will throw in a tablespoon here or there if I want to make a GF batter recipe more stable and thick. Remember, 1 tablespoon is equal to 3 grams of fiber. That is excellent stuff!

Happy baking and cooking to all you gluten free buddies!

Sunday, January 22, 2012

Chicken Bellagio

The amazing part is that this can all be made gluten free!

I grew up in a very small town. The only restaurants were Mom and Pop types, with the exception of one McDonald's. What town doesn't have one of these (unfortunately)? My Mom raised me by herself (after rearing 4 older boys, Amen.) and had barely enough energy after a long day's work, to go grocery shopping, let alone come home to cook a meal and clean up after it. So, we ate out. A lot.

Fast forward 15 years, during my first few years of marriage, we had moved to several different places. I remember looking in the phone book of Pensacola, Florida and gasping at the 15+ McDonald's listed in the Yellow Pages. Where I am going with this is that my initial love for chain restaurants came with my new exposure to them. Applebee's, Chili's, Outback, Olive Garden, etc.....all of these were so wonderful to my virgin, chain restaurant going self. Now, I won't go to these places without a blindfold and pretty much a gun to my head. I will sacrifice for a trip to Olive Garden very rarely only because my eldest daughter loves it so much and we tend to treat her on her birthday. I wasn't a fan of Chik Fil A and Five Guys (again, limited exposure to these) until a few years ago, but that is waning also. Enter, CHEESCAKE FACTORY (Angels singing "Hallelujah"). I know, I know....it's still a chain and it's still "junk" food. However, if I am going to have to eat while out and about, and there happens to be one in the vicinity, I am there. The spiral bound book of a menu, the variety of meals from Asian, to Mexican, to home-style cooking, never mind the bazillion types of amazing cheesecake.....and it all tastes GOOD! So here it is, my rendition of "Chicken Bellagio", a favorite of mine (one of too many) from the Cheesecake Factory. Here's to you Lyssa, my Chicken Bellagio buddy.....and to you, my brother, Scot, for the wonderful trips we've made there and the many gift cards you have furnished us for there!

(This recipe is made without wheat based flour, but you can sub any flour, including white/wheat if you so desire)

CHICKEN BELLAGIO (Cheesecake Factory inspired)

This is for 6 servings- so halve the recipe if you desire. Leftovers are yummy too!

3 boneless chicken breasts, sliced into 6 filets by cutting breasts into thin halves
(like cutting a deck of cards in half)- some pound the chicken, but I prefer to skip this step
6 slices Prosciutto


Breading:
1 1/2 cups all purpose gluten-free flour mix (or your choice of flour)
1/4 cup Parmesan cheese
1 Tbsp. sea salt
2 tsp. cracked pepper
1 Tbsp. oregano
3 large eggs, beaten
splash of milk

Sauce:
1 pint heavy whipping cream
6 Tbsp. prepared pesto sauce (your choice, I used Buitoni's, makes it easier and tastes great)
2/3 cup Pecorino or Reggiano Parmesan (Pecorino is from sheep's milk, Reggiano is from cow's milk)
2 tsp. salt
1 Tbsp pepper

Pasta and the rest:

Angel hair pasta- enough for 6 servings (use this brand for wheat free pasta: Ancient Harvest Quinoa )
3 Tbsp. prepared pesto for prepared pasta
1 stick of butter, for frying, and extra for the prepared pasta
3-4 Tbsp. olive oil for prepared pasta
3 cups Arugula, washed
1/2 cup grated, fresh Parmesan for topping

*In a container, mix flour, Parmesan cheese, salt, pepper and oregano. In another container, whisk eggs and splash of milk. Set two together as a station.
Here is my egg wash and flour dredging station
 Heat heavy pan on medium heat, add 2 Tbsp. butter. Coat chicken breast in flour mix, then egg mixture, then dredge in flour mixture again. Place in hot butter and fry each side until golden (adding more butter as needed). You will need to fry in batches, cleaning pan with paper towel (see my photo) in between. Then place in a baking dish. Finish in oven at 375 degrees F for 10 min. to ensure the middle is cooked thoroughly (but not too dry!) Check one piece to see if it is cooked before taking out of oven.

I used gluten free flour for this and look how yummy, golden brown it is!

I use my tongs and a paper towel to wipe up in between batches. This helps avoid any burnt bits on the subsequent batches.

Pasta and Prosciutto: While chicken finishes in the oven, boil your pasta according to directions. Lightly fry the Prosciutto slices in pan with small amounts of butter. Save aside. Make cream sauce next.

Sauce: Heat heavy cream until hot in sauce pan, add the pesto sauce and whisk. Add salt and pepper. As sauce begins to thicken, add the Parmesan cheese while whisking constantly to incorporate. Continue until mixture thickens then reduce to very low/warm until ready to serve.

Assembly: After draining pasta, add the 3 Tbsp. prepared pesto, add 3 Tbsp. butter and 3 Tbsp. (or more if you'd like) of olive oil. Toss well. Place 1/2 cup of Arugula on plate, top with a serving of prepared pasta, 1/3 cup of cream sauce, one of the chicken filets, the lightly fried Prosciutto, and freshly grated Parmesan.

The peppery flavor of the arugula truly compliments the Parmesan sauce and all the flavors of this dish, don't skip it!


I cannot tell you how impressed I was with myself. This could almost pass in a blind taste test for the real thing. Try it yourself and tell me if you agree! Excuse me, I have some leftovers calling.

Saturday, January 21, 2012

Easy Miso Soup

This is all organic, delicious, healthy, made with light Miso paste

I discovered this Miso Soup paste recently, and I must say, it tastes delicious even by itself! Whenever we go to an Asian restaurant, 2 of our daughters enjoy the Miso soup tremendously. I find satisfaction in knowing that I am able to make an organic version in my own home, any time. It is so easy that my daughters also can make it! You should be able to find this at any well stocked health food store.

Miso Master Light Miso Paste Ingredients: Organic Whole Soybeans, Organic Handmade Rice Koji, Sun-Dried Sea Salt, Blue Ridge Mountain Well Water, Koji Spores.
Aged 2 - 4 months.
Unpasturized


I dare say it is considered gluten free. It is made in a facility with barley, fyi. My daughter has an intolerance to gluten, not Celiac's disease, and this is perfectly fine for her.

The only 2 necessary ingredients (besides hot water!)


It looks like a thick hummus!

Here it is:

10 oz. of hot water, 2 Tbsp. Miso soup paste, 2 Tbsp. Better Than Bouillon paste (OR if you are lucky enough to have some bone broth or home made stock, use that instead. Just heat 10 oz. broth/stock then add the Miso soup paste.) Stir well. Enjoy!

*Note, do not put the miso paste into boiling water, only resting hot water, as the probiotic benefits will decrease.


Optional: Sliced baby bok choy and/or sliced scallions- add in at any point

Friday, January 20, 2012

FLUORIDE: Good or Bad?

Fluoride: Good or bad stuff?


I just had my bi-annual dental cleaning. I have a great dentist and hygienist. They are a husband and wife team. My girls also to go them for cleanings and other dental issues. Thank God for our insurance because our genetics have wreaked havoc on our children and they have had some interesting mouth issues. The youngest is the most puzzling as she has an extra tooth on one side of her mouth and is missing one from the other side. Needless to say, even with insurance, most of the girls' college funds have gone away due to dentistry and orthodontia!


I never had health or dental insurance as a child. I ate sugar like there was no tomorrow and I had horrible dental hygiene until I finally figured out that I NEEDED to brush my teeth in about middle school. By that time it was too late, the cavities were there. Thankfully the baby teeth bore most of the brunt and, after being infected, fell out and I was pardoned as the new, clean teeth erupted. Talk about second chances....phew. So, just a few cavities needed attention, oh, and I can't forget the root canal, by the time I had my first ever dental appointment at age 14.  I brushed my teeth always after this huge lesson in life. 

How does a horse get straight teeth?


Between 14 and 23 years old, I may have seen the dentist 3 or 4 times, I don't recall. After 23 years old, I was able to go for regular check ups as my husband was in the military we had insurance. It was at this age that I had to have another root canal. Thankfully, I have not had one cavity since. I got to have braces, at age 30, to straighten out these pearly girls. Flossing became a breeze after those years of braces! 


So, the subject is FLUORIDE. My Momma has always been a holistic girl, which came in handy since we didn't have health or dental insurance! She has always felt that fluoride (and other chemicals used in our daily routines, such as aluminum in antiperspirants) is harmful to our bodies. 


I have this discussion with our hygienist every time we go in. She is a very smart cookie and has the most amazing memory ever. I really feel like we are in good hands with her. I do not doubt her education on fluoride. I know that the college texts that one studies will all sing the praises of fluoride and it's benefits. The last time I was in, just a week ago, she showed me a photo of a tooth without fluoride and one with fluoride treatment. It was a highly magnified photo showing the pores of the tooth (did you know our teeth have pores?). In one tooth I could see the pores, like little open holes. In the other, the tooth was completely smooth because the fluoride fills in the holes to keep the pores clogged, essentially. I totally understand how fluoride bonds to and helps protect the teeth. I don't doubt it's effectiveness at this. All that concerns me is the toxicity of fluoride and how easily it is put into our bloodstream as it enters there through the mouth- the most direct way.  

Pores in a tooth


So, WHAT IS FLUORIDE? To get the actual scientific explanation, go here: Fluoride by Wikipedia

To be honest, that all means nothing to me because (besides the fact that my lab partner went on to become a professional criminal) I hated chemistry for the most part. 

Propaganda? Do your own research and decide for yourself.

 
The truth is that there are two distinct types of fluoride. One is calcium fluoride. Calcium fluoride is natural and occurs naturally in lakes. It is not usually a major health concern.

The other type is sodium fluoride. Sodium fluoride is a toxic waste, classified as a hazardous waste, and it is a byproduct of the nuclear and aluminum smelting industries. It is highly hazardous to human health, and is associated with conditions such as cancer and Alzheimer's to name only a few. 


Unfortunately, the latter of the two is what is used for our teeth.


Here are some great Q & A's I found on fluoride (original link here)


Question 1: 


 Is Fluoride Really Bad for Me? Yes and no.
Calcium fluoride is a naturally occurring mineral in dirt and is considered relatively harmless to humans due to its extreme insolubility. Unfortunately, this is not (and never has been) what is being added to our toothpaste, mouthwash, liquid drops and municipal water supply systems under the guise of dental health. It is silico-fluorides that are being added to 90% of public water systems. Silico-fluorides (including sodium fluoride) are highly toxic industrial grade hazardous wastes generated during aluminum processing and captured in the air pollution-control scrubber systems of the phosphate fertilizer industry. Fluoride in this form causes osteoporosis, thyroid disease, damage to the immune system, heart, lungs, liver, brain, skin, arteries, and premature aging.2
Until the aluminum and fertilizer industries figured out a way to convince our government to actually buy these waste products from them (using heavy handed marketing, lobbying and other tricks) they had to pay huge sums of money to "safely" dispose of these toxic chemicals.Advocates of sodium fluoride supplementation argue that the amount of sodium fluoride added to toothpaste, mouthwash, liquid drops and drinking water is too small to have an adverse effect on human health. My question is, "how much toxic poison do you want to put into your body?"
If sodium fluoride is safe to put into your body, why does every tube of Crest and Colgate have a warning on it not to swallow their toothpaste? Everything you put on your skin (including the skin tissue inside your mouth) is absorbed directly into your bloodstream. That is why nicotine and hormone patches placed on the skin are an effective means of administering those substances to the bloodstream. The blood vessels under your tongue have the thinnest walls of any blood vessels on the body externally accessible. This is why a thermometer under the tongue is an accurate measure of internal body temperature. This is also why placing certain supplements and medications under the tongue is an effective means of administering those substances (sublingually.)


Question 2:


If Sodium Fluoride is Bad for Me, Why Does My Government Add it to My Drinking Water?
That is a very good question! Sodium Fluoride supplementation began in 1947 when Oscar Ewing, a former Alcoa Aluminum lawyer, became head of the U.S. Public Health Service. Alcoa was one of the biggest producers of hazardous fluoride waste at that time. A ten year experiment was performed adding sodium fluoride to the drinking water on the towns of Newburgh and Kingston, New York. Apparently, the U.S. Public Health Service misread the statistics and claimed a 65% reduction in tooth decay. They then used this incorrect data as justification to proceed to fluoridate the drinking water in other cities, a practice which continues to this day despite strong controversy.4
Today, there is a great deal of scientific agreement that ingested fluoride does not, in fact, reduce tooth decay.5  Upon reviewing the evidence, some EPA scientists have recently concluded that the public water supply should not be used "as a vehicle for disseminating this toxic substances." They called for "an immediate halt to the use of the nation's drinking water reservoirs as disposal sites for the toxic waste of the phosphate fertilizer industry."6 Some studies have actually shown an increase in tooth decay with a corresponding increase in fluoride exposure in children!7 I could reference many other well documented studies that show fluoride supplementation does not, in fact, reduce tooth decay.


Question 3:


I have municipal water in my home. What can I do?
1.    Drink only purified water using a good reverse osmosis or distillation system.
2.    Collect and drink spring water in glass jugs. You can find a local spring at http://www.findaspring.com/. Beyond Organic sells "REIGN" Mountain Spring Water
3.    Install good shower head filters and sink faucet head filters.
4.    Consider installing a good whole house water filtration system.
5.    Use fluoride-free toothpaste. Dry baking soda works fine and saves money.
6.    Do not supplement with fluoride tablets or liquid.
7.    Find a good dentist that does not use fluoride. 

I think it's fair to say that flossing is something we can all agree on?

 So, do your own research if you are on the fence. I have always been told that by simply brushing and flossing, that is all we truly need to keep our teeth cavity free. I use a fluoride-free toothpaste mostly, but sometimes my teeth sensitivity is so bad that I have to use Sensodyne brand. This has fluoride which will help smooth over those pores. I don't like having fluoride, but I can't not brush my teeth either (due to the pain from the sensitivity). Advice to everyone, use SOFT head toothbrushes. All the others are too abrasive and cause your gums to recede (I wish I knew this a long time ago!).
One thing I am working on in life, I can't beat myself up for knowingly exposing myself to some substances that I know are harmful. I cannot escape everything. For those on the "Purist" side of the fence, this sounds silly to you, I am sure, but there can be consequences to anything. The whole "in moderation" stance, is not a bad way to be in my opinion. If I were pregnant, I would certainly take the purist's stance for the sake of the vulnerable baby. But, we all have our thresholds. Don't drive yourself crazy with TOO much information. Fluoride, after all, is only ONE element that can be encountered daily. And, just as I have decided, I don't need it every day, but there are some that I do. Just do what feels right for you. 

Wednesday, January 18, 2012

Easy Beef Stew with Scalloped Potatoes

Grass Finished, organic stew beef makes a great comfort meal!

I guess I am a meat and potatoes kind of girl.  At least for today I am. This meal has "comfort" written ALL over it. Please try to find some Grass Finished beef, no garbage (hormones, antibiotics, etc.) and pasture raised. And, as usual, if you are able to purchase your groceries as all organic, do so! If not, do what you can, every little bit helps. Let's get on with it!

Ingredients for Beef Stew:

2 -3 lbs. of Grass Finished, organic beef stew chunks (or if it's cheaper, buy a roast and cut it yourself, ask the butcher what he recommends)
1 cup all purpose gluten free flour
1 Tbsp paprika
1 Tbsp garlic powder
1 Tbsp thyme
1 Tbsp salt
1 tsp cracked black pepper
2 medium onions, sliced
4 cloves garlic, minced
your favorite healthy oil or butter
1 cup beef broth


Saute onions in your favorite oil or butter on low-medium heat until slightly caramelized. Add a tad more oil/butter and saute minced garlic for 30 seconds. Put onions and garlic mix on the bottom of a large baking dish.

Grass Finished, organic beef


Mix flour with the spices. Heat large pot or pan on the stove with your favorite oil to a medium heat. Use slightly lower heat if using butter. Pat beef chunks dry with paper towels (don't be tempted to skip this or you'll have a soggy mess on your hands later). You will need to cook the beef in 3-4 batches, adding more oil/butter for each new batch. Sear beef chunks on all sides.  Cover onion mix with beef chunks. Pour in the beef broth, cover with foil. Bake on 350 degrees for about 2 hours or until fork tender.
Braising first batch of beef with gluten-free flour and healthy oils/butter

first braised batch done

All 3 batches ready to be roasted in the oven, cover tightly with foil to roast.

Scalloped Potatoes
I could eat this all day


Ingredients:


2 lbs. (or roughly 5 medium potatoes) of your choice potatoes (I prefer yukon gold, red, or white) sliced thin
1 Medium yellow onion, sliced
8 oz. shredded medium cheddar cheese
1 cup heavy cream
1 tsp. nutmeg
salt
pepper
5 Tbsp. butter
Mix ingredients all together

Pour out into a baking dish, top with butter pats, and put in oven with beef during the last hour, uncovered

Mix all ingredients in a large bowl and then dump into a large baking dish. Top with pats of butter. Put in with beef stew (at 350 degrees F) for the last hour, uncovered, or until potatoes are tender. *If making this dish separate to this recipe, it would be faster to cook at 375 degrees F for 45 min.
Close up goodness!
Caramelization = love

Fruity Smoothie (with lots of benefits!)


I don't go by recipes for much, especially when making a smoothie. It is usually made from whatever I happen to have on hand. Today's smoothie came out great, I must say. This one could have doubled as a dessert, so if you don't like too sweet, leave out the Agave.

Ingredients: 

1/2 cup Raspberry Amasai (or yogurt, or kefir)
1 banana
1 kiwi (ends cut off)
1/2 cup strawberries (I used frozen)
1/2 cup blueberries (I used frozen)
splash of milk
1 Tbsp. agave syrup
2 Tbsp. ground flaxseeds

Blend until desired consistency is achieved, adding a splash of milk extra if needed.

Wednesday, January 11, 2012

Raw Milk Vs. Pasteurized

There is always more than one way to approach anything. Problem solving 101. Some issues that seemingly cannot be resolved, really could be, if there were more effort and thought put into it.  In regards to raw cow milk, the biggest debate seems to be whether or not it should be legalized in all 50 states. As of last year, raw milk sales were legal in 10 U.S. states, illegal in 11 states, and all the rest were legal with caveats, such as "for pet consumption only" or "for farm sales". One way that states, such as New York, are getting around the law is to sell shares. Quarterly, each share holder pays money towards the "ownership" of dairy cattle at a raw dairy farm. Because these share holders technically own their own cows, they would be allowed to drink the milk from said cows.

So why the division? Well, let us explore first,

What is Pasteurization?


Pasteurization (named after Louis Pasteur, who discovered it) is a process of bringing a liquid up to just below boiling point, for a period of time, to kill any potential harmful organisms (E. Coli, salmonella, etc.), then bringing back down to a cool, stable temperature. 

Bottom line, advocates of pasteurization feel that "Raw milk can harbor dangerous micro-organisms that can pose serious health risks to you and your family."- The FDA.

So, the raw milk fans rebuttal goes like this: "It is POSSIBLE for raw milk to harbor dangerous micro-organisms, but it is possible for ANY food, raw or pasteurized, to harbor dangerous micro-organisms. We do not advocate drinking unpasteurized milk from modern Holsteins, bred to produce high volumes of milk, injected with recombinant Bovine Growth Hormone (rBGH), and raised in commercial feedlots where they are crowded and stressed and given antibiotics to keep them from being sick. That milk DOES need to be pasteurized to lessen (not eliminate) the possibility of food-borne illness. We advocate the drinking of raw milk from old-fashioned breeds of cows raised on pasture, with plenty of green grass, sunshine, and room to move. Properly raised and milked in clean conditions, this milk is extremely unlikely to harbor dangerous micro-organisms...in fact, less likely than commercial, pasteurized milk.  Also note the second comment below regarding the relative safety of ALL dairy compared to other foods." - RawMilk.com

I found a great Farm in Pennsylvania (I wish they delivered to my house a thousand miles or so away!) that offers certified organic, raw milk from Jersey cows. They have a great little story and a great explanation on why what they offer is superior, check it out here: Your Family Cow

Here is a comparison chart on what raw milk advocates would like most of us to know regarding differences in what the FDA is considering raw milk and what responsible, knowledgeable farmers consider raw milk:


CONDITIONS AFFECTING RAW MILK QUALITY
THE OTHER RAW MILK PRODUCED FOR DIRECT CONSUMPTION
RAW MILK PRODUCED FOR PASTEURIZATION
Diet Base (1)
Grass-based diet promotes alkaline conditions conducive to beneficial organisms
Grain-based diet promotes acid conditions conducive to pathogenic organisms
Living Environment (2)
Mostly on pasture
and natural grains
Mostly confined
Additional Intervention (3)
Rarely used
Bovine growth hormones
and antibiotics
Life Span (4)
12+ years
3.5 years
Nutritional Quality (5)
5 to 6 times more CLA
Higher vitamin content
Vitamin D from the sun
Minimal CLA
Farmer's family consumes the milk (6)
YES
NO
Consumer Willing to Pay a Premium Price
YES
NO


After considering the chart, it appears as though raw milk advocates agree with the FDA, that the milk on 99% of supermarket shelves ought to be pasteurized. All the raw milk advocates want is to be able to legally consume and sell for human consumption, healthy, properly handled, raw milk. Why can't the FDA form a regulatory entity that can supervise raw milk dairy farmers and allow raw milk, in its healthiest form to be sold?
Since when does the FDA REALLY care about our health anyway?


Here is more information I found on processed dairy: "Processed dairy is any dairy that has been altered from its raw state by heating the dairy above a cow's body temperature. Pasteurization, irradiation, boiling or homogenization are the most commonly known forms of processing. Also, the processes of chemical treatment are used to enhance flavor, fortify and preserve bad-tasting milk that has been heat-treated and putrefactive. The common store type of milk is processed to the extent it turns blue. They add large amounts of dolomite (mined calcium carbonate, that is rock) to make it white and add irradiated hydrogenated vegetable oil as Vitamin D. Hydrogenated oil has the same molecular structure as plastic unlike natural raw milk." www.RawMilk.org

The process of pasteurization not only kills "bad" stuff, it kills the good stuff too. Assuming one were to pasteurize the milk of a truly healthy cow, handled properly, one would only be ridding the milk of it's benefits. The pasteurization process removes vitamins, minerals and enzymes from the raw milk and kills friendly bacteria may help with digestion and strengthen your body's immune system. What is more is that people who are lactose intolerant can usually tolerate raw milk. There is little difference in the taste of raw vs. pasteurized milk.

Here's the thing (through my eyes), no two cows, farmers, farms, pastures, conditions, or whatever, are going to be equal in health, genetic superiority, or handling. So, it seems, we have many variables that go into the end product, milk.

Some people are immune compromised and are strictly told not to eat raw dairy products. I can understand that philosophy. I also understand that immune compromised people, and even those of us who are blessed enough to be healthy, can come in contact with harmful organisms through SO many foods (spinach, cantaloupe, hamburger, sushi, eggs, to name a few common culprits).


I love that he has some "leftovers" on his nose!

If you are lucky enough to know of a dairy farmer (Jersey cows, or any ancient A2 breed) who sells raw milk, and you can visit the farm any time, I would recommend it rather than the carton off the shelf at your grocer. This is strictly my opinion based on my own research. If you drink cows' milk, I  would love to hear what type you drink and why?

Tuesday, January 10, 2012

Quickie Chickie Soup!


I happen to have a lot of sick friends lately. Yes, a lot of my friends are sickos. It makes my life happy to know that I am not the only one.

There are SO many chicken soup recipes (traditional caldo de pollo is one of my favorites!). My Momma has always touted that chicken soup with lots of garlic and ginger is healing. She used to make for me a version called, "Penicillin soup" that she claimed had healing powers. Anytime someone in our family came down with some sort of cold or flu, my Mom would get a phone call (before the internet) begging her for her prized recipe.

This quickie recipe goes out to all you sickos who don't happen to have your own, home made organic chicken stock in your fridge or freezer. I always intend to make it, but it rarely happens. "Bone broth" does have some wonderful healing properties and is what I recommend first and fore most, but in a pinch, this is second best, in my opinion:
I found BIG jars of this at my Costco store. It is a deal if you can buy it that way!

So that  is it, up there ^ , my secret weapon for "in a pinch chicken stock" in any recipe. I love it.

For a small batch of Quickie Chickie Soup (about 4-5 servings) you will need:

Please do not notice that I grabbed the beef flavor instead of the chicken, I did catch it before adding to the water.
1-2 boneless chicken breasts, chopped into thumb nail size pieces (the healthiest chicken you are lucky enough to find)
1 small onion, minced
2-3 cloves minced garlic
6-8 carrots, peeled and chopped into 1/2 inch chunks
8 cups of water (purest water you have access to)
Prepared rice- your choice of grain (I used Thai/Jasmine rice because that's what I had in my freezer from extra after our dinner the other night)

*If you like ginger, use freshly minced if possible, and add into the stock at any point for extra bonus points!

Saute the onion in your choice of healthy oil, butter, or ghee for about 1-2 minutes, then add the garlic, saute one more minute. Add 8 cups of water, 2-3 Tbsp. of the "Better Than Bouillion" paste, according to how salty you like your broth. Bring to a low boil, add carrots, simmer for about 5 min. then add the chicken pieces. Add your rice, and once chicken is cooked through, voila! Easy peasy (Rachel Ray, I can say it if I want to).

Make some and GET WELL!

Friday, January 6, 2012

Roasted Sweet Pepper Salsa

Roast these sweet mini-peppers to get a wonderful flavored salsa
Sweet roasted, mini-pepper salsa
I rarely make the same recipe twice, especially salsa. There are way too many combinations that can be created with salsa, which is a wonderful thing.

Here is a recipe I threw together recently. I rather liked it's outcome!

8-10 sweet mini-peppers, roasted: broil for about 3-5 min. or until slightly charred, then when cool, cut off tops and scrape out seeds

1 medium size onion, quartered
2-3 cloves raw garlic
6 medium sized fresh tomatoes, quartered and insides/seeds scraped
1/2 can of green chilies
2 Tbsp of vinegar (I used coconut vinegar)
Juice of 1/2 fresh lime
1-2 Tbsp. of salt (to your taste)
1 Tbsp pepper
2 tsp powdered cumin

Sweet, roasted, mini-peppers

Blend with small pulses....this baby is particularly speedy, thank you honey for my new toy!

Put all above ingredients in your food processor or blender and give it whirl (but not too much!) until desired consistency is achieved.

Thursday, January 5, 2012

Best way to wash your produce


Several years ago (geesh, I have been starting out a lot of blogs that way lately....a sign that I truly AM getting "old"), before most grocery stores had a "Natural and Organic Foods" section, before the internet (did I really just write that?) and the age of information, I had a friend. This particular friend was a nurse. She was sweet as pie and to date, she is the only person I have ever attempted making sushi rolls with. I was just at the beginning of my conscious eating stage at this time. I remember having a conversation with her about organic verses conventional produce. The talk must have become slightly heated because I do not remember anything in detail about the conversation except the part where she looked at me rather annoyed and said with slight disgust, "Well, I DO peel the skins" meaning from her conventional produce. This was her way of telling me that she felt the skins carried all the pesticides and it is easy enough to get rid of the chemicals by peeling the fruit or vegetable. I stopped talking at that point-and quickly changed the subject.
gorgeous carrots soaking in peroxide with water

The easiest way for me to articulate how pesticides, fertilizers, and chemicals infiltrate fruits and vegetables is to imagine a white carnation flower in a vase. Fill the vase with water and several drops of red food coloring. Not long and the white carnation will be pinkish-red. The water is absorbed into the stem and continues into the outermost edges of the flower. The same process happens with farming and cultivating produce, except often there is an added process with applications of outer spraying or dusting. What the fruit or vegetable is grown in, becomes part of itself, throughout. It is not just an outer layer, for most fruits and vegetables, that is affected.
Colored water is absorbed throughout the flower

It is well known that the skin of most fruits and vegetables carry with it most of the nutrients and fiber that makes that particular food healthy (assuming it is organically grown). By choosing to eat organic, one can eat the skins without worry, and the whole apple for that matter!

Even though 95% of the produce I bring home is organically grown, I still put it through a rigorous wash. One never knows how many times an apple has been touched, dropped on a floor, etc. It's a good measure to take.

Pile O' produce needing to be washed!


Here is my regime, my husband LOVES to help me do this after our Whole Foods bi-monthly trip (she writes facetiously):

1 large bowl of ice water and 1/2 cup of hydrogen peroxide

1 large bowl of ice water and 1/2 cup of white vinegar

large strainer

paper towels

produce storage bags (mesh, paper, plastic)

Do all your produce at the same time, to save on time and water. Start with the "cleanest" items that have edible skins, like your apples, pears, grapes, tomatoes, cucumbers, carrots, etc. Using the same water as you go for each item(s).  Dip in the hydrogen peroxide bath first, for 10 min., then on to the vinegar bath for 10 min. Rinse with plain water, dry, then place in most appropriate bag for freshest storage (potatoes in paper, apples in mesh bag, cucumbers in plastic, etc.) By this stage, you might have very slightly dirty water, but plenty clean for the next round of produce such as potatoes and produce with non-edible skins (melons, bananas, avocados, citrus fruits, etc.)
Take off any stickers, then start with cleaner produce first

All these rules drive my husband bananas- no pun intended- but when we spend our hard (ok, his) earned money and drive 2 hours round trip to get beautiful, organic produce, there is protocol to follow to ensure that our efforts and money do not go to waste.

So here are some "rules" to follow: Do not clean the following fruits or vegetable until you are ready to prepare them:


1. strawberries - can get mushy quicker if water sits in between berries
2. raspberries - almost always get mushy within 24 hours if wet
3. asparagus -tips get wet, then slimy quick
4. mushrooms -brown, bruised and slime quickly after washed
5. onions -don't need to be washed, the skins keep 'em clean
6. only clean lettuces and leafy vegetables (including herbs) ahead of time if you plan on getting out the salad spinner- and make sure to put some paper towels in with the washed lettuce as it helps keep it fresher, longer with less wilting/spoilage
Usually the lettuce sold in bulk (not in sealed bags or plastic clam shell containers) are the freshest, buy them when you can!

After soaking lettuce in peroxide & water, then vinegar & water, rinse well and, in batches, spin out the water

Prepare a new, clean bag, with clean paper towels inside and clipping the top closed. This helps keep the lettuce crisp and fresher for longer.

2 bags of fresh, clean lettuce ready for the fridge!
Soak and clean potatoes as all other produce, then let or pat dry before putting into paper bags

Ready for whenever I want to use them!

The beauty of it all is when I reach in the fridge,  for the night's meal preparation, and everything is sparkly clean and ready to be used! It's also great for the kiddos to grab an apple or a carrot and just go.